Master Surface Material
Update 13-03-24
- Put all the material parameters and nodes in a separate material function. Duplicated and resorted the parameters for both Material A and B and set up another material function to blend both materials together and allow for vertex painting with as a start some control over the blend contrast. Next step is improving the blend for materials using displacement.
As part of my Unreal learning journey I started focusing more on the material editor. In this first part I learned to set up an extensive master material for any basic opaque surface. The goal was to open up control over all the main functions such as:
- Base color
- Metallic
- Specular
- Roughness
- Emissive
- Normal
- Ambient Occlusion
- Displacement
With options to chose to use default scalar/ vector parameters or textures and a choice between 2 ways of tiling.
My next focus to extend this material would be to allow material blends and options to use world aligned texture and Triplanar projections.
Hoping to update within the first quarter of 2024!
Demonstration of vertex painting/blend using the modeling tools
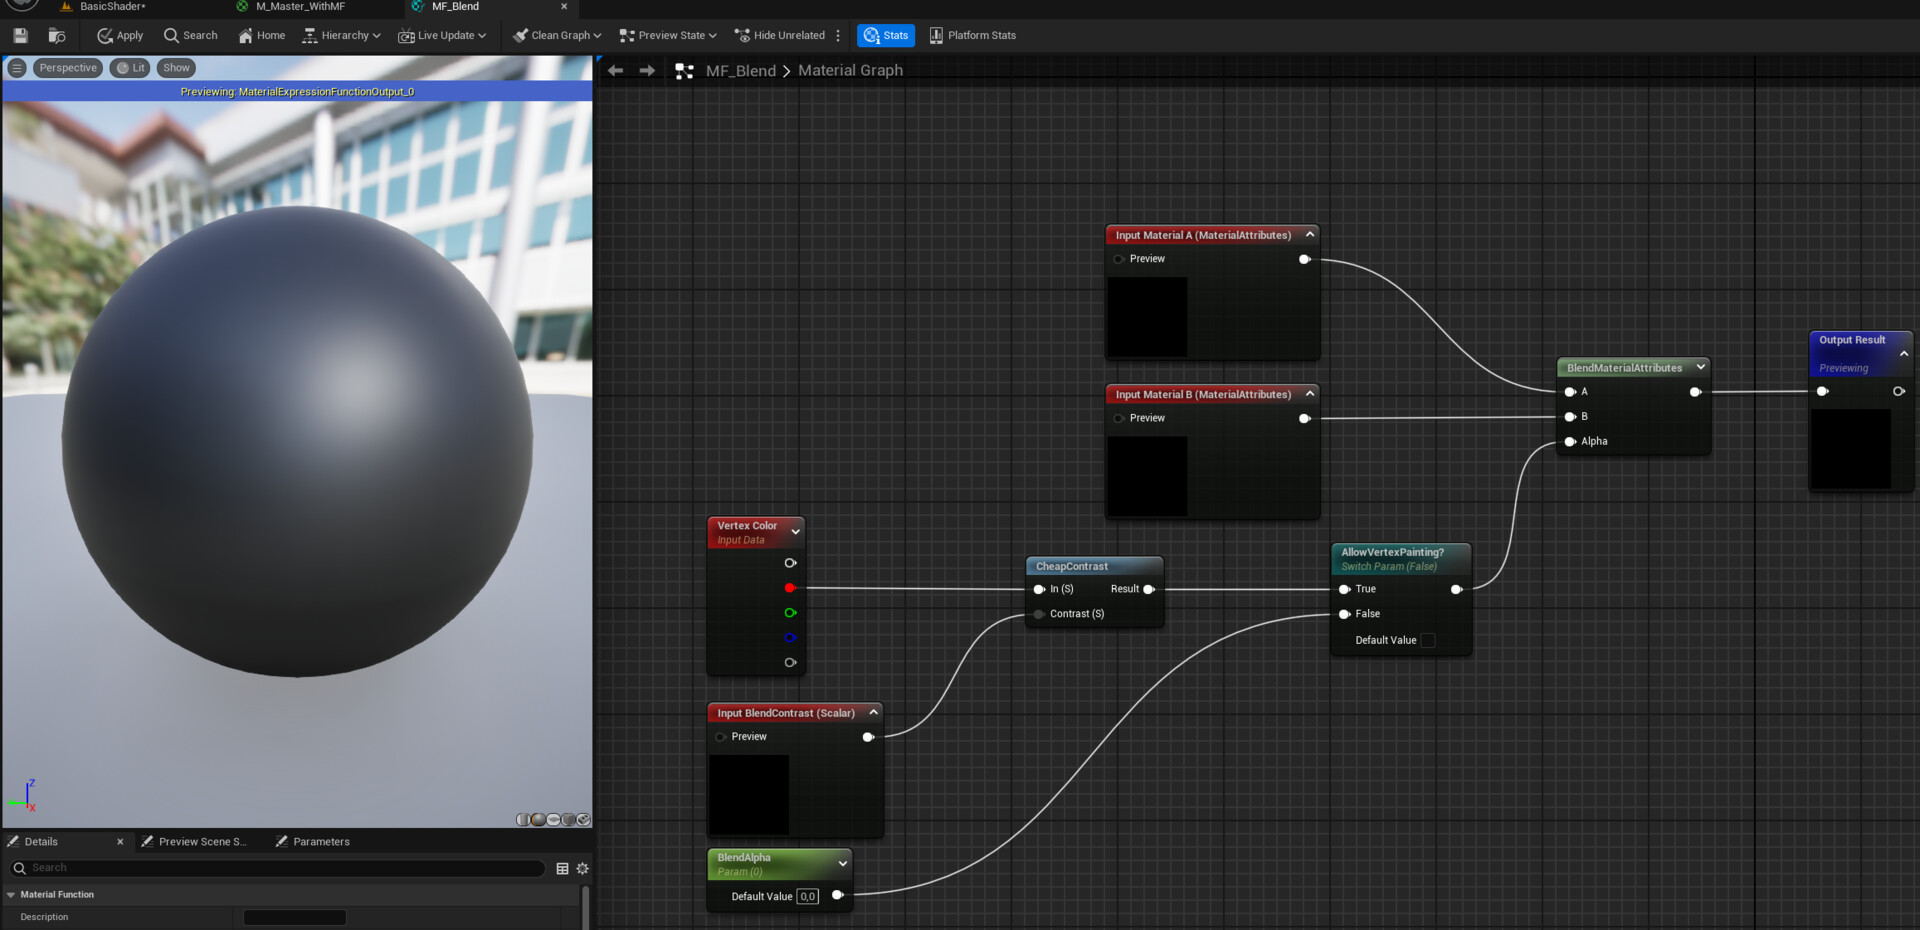
Updated my master material with a blend function to allow the option for vertex painting

Updated my master material by putting all the material attribute nodes in a separate function. Then opened up the option to blend and use 2 different materials in one.
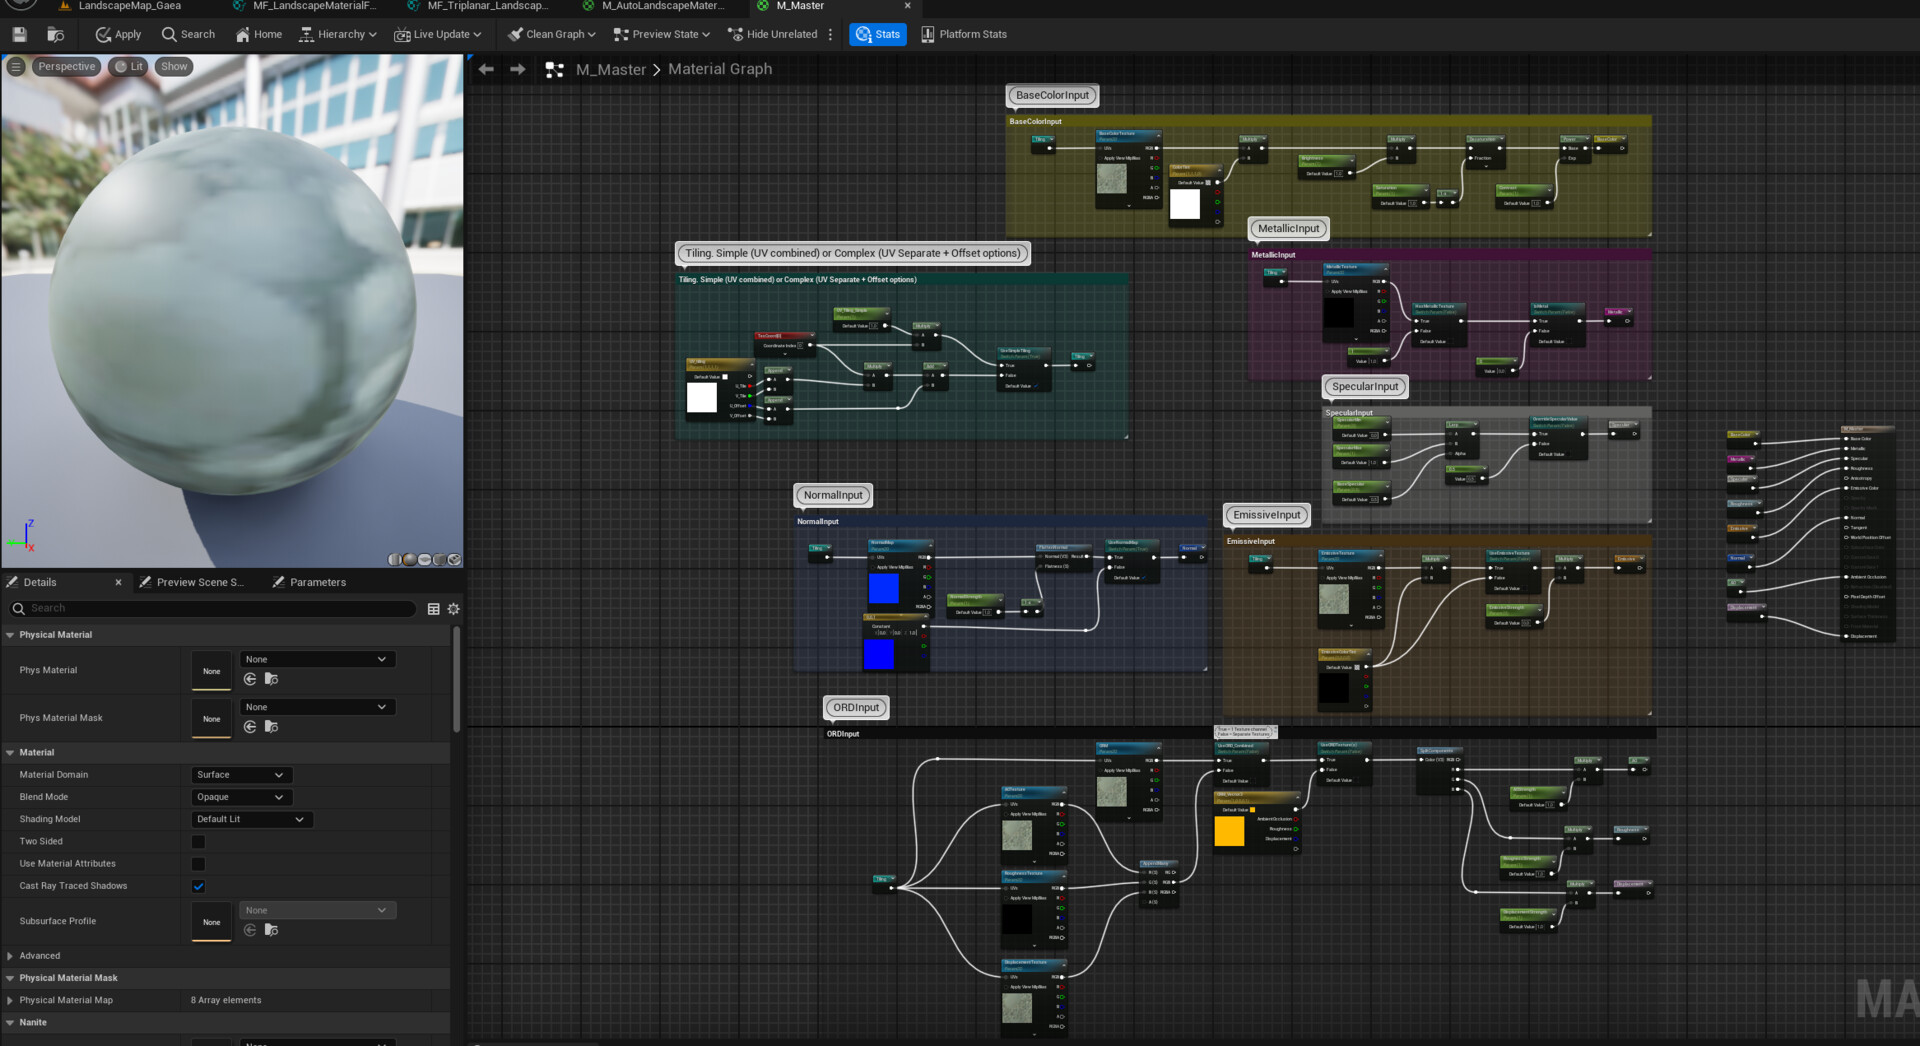
Overview of the Master material

Overview of Material Instance with available parameters